Fixing a Slow-Draining Shower Without Harsh Chemicals
Standing ankle-deep in lukewarm, soapy water while taking a shower is an annoyance most homeowners know all too well. When water begins swirling sluggishly around the drain instead of disappearing instantly down the pipe, the instinctive reaction is often to run to the nearest hardware store, grab a plastic bottle of caustic chemical drain cleaner, and pour it into the opening.
While liquid chemical cleaners promise a quick, hands-off fix, they often create far more problems than they solve. Most slow-draining showers do not require scorched-earth chemistry to run freely again. With an understanding of what causes these blockages and a few straightforward mechanical techniques, you can clear the line safely, protect your plumbing, and keep toxic fumes out of your home.
The Hidden Costs of Chemical Drain Cleaners
Commercial drain openers rely primarily on concentrated sulfuric acid or sodium hydroxide (lye). These chemicals generate intense heat through an exothermic reaction designed to melt organic matter. While that reaction sounds effective in theory, it poses significant risks to residential plumbing systems.
Modern residential drain lines are typically built from polyvinyl chloride (PVC) or acrylonitrile butadiene styrene (ABS) plastic. The high temperatures produced by caustic chemicals can soften or warp plastic pipes, compromise the cement bonding their slip joints, and trigger slow, hidden leaks inside walls or subfloors. In older homes with cast iron or galvanized steel pipes, harsh chemicals accelerate internal corrosion, eating away at already thinning metal walls until they fail.
Safety considerations extend beyond pipe integrity. Enclosed bathrooms with minimal ventilation quickly trap corrosive chemical fumes, which irritate lungs, eyes, and skin. Furthermore, if a chemical treatment fails to clear the obstruction, you are left with a standing pool of hazardous, caustic liquid. Anyone attempting to snake or plunge that drain afterward faces a serious risk of chemical splashback, which can cause severe skin burns or permanent eye damage. Mechanical and natural clearing methods bypass these hazards entirely, offering a dependable fix that preserves your plumbing.
Understanding the Anatomy of a Shower Clog
Unlike kitchen sinks, which frequently choke on grease, coffee grounds, and food solids, shower drains face a very specific opponent: hair bound with soap residue.
Every time someone showers, loose hair washes down the drain. Hair strands catch on the drain grate crossbars, the mounting screws, or the internal ridges of the drain body. Once a few strands anchor themselves, they act as a net, snagging additional hair, dead skin cells, body oils, and heavy conditioners.
Over time, this tangled mass reacts with the fatty acids in bar soaps and the minerals present in domestic tap water. The result is calcium stearate, commonly known as soap scum—a dense, sticky paste that acts like mortar between the strands of hair. As the mass expands, it coats the interior of the P-trap, constricting the pipe diameter until water can barely squeeze past. Because the obstruction is essentially a fibrous, felted rope saturated in waxy paste, physical extraction is consistently more effective than trying to dissolve it with liquids.
Step 1: Remove the Drain Grate and Clear Surface Hair
A surprising number of slow drains are caused by debris trapped right at the drain opening, just out of plain sight. Clearing this area is always the first move.
Start by examining the drain cover. Depending on the design of your shower, the grate will either unscrew, pop off, or lift out.
Screw-In Strainers
Many traditional shower grates are held in place by two small stainless steel screws. Remove the screws using an appropriately sized screwdriver and place them safely outside the shower stall so they do not fall down the open pipe. Lift the grate off carefully.
Snap-In Grates
If there are no visible screws, the grate likely features tension clips around its perimeter. Insert the flat blade of a putty knife, an old flathead screwdriver, or a bent paperclip under the rim and gently pry upward until the cover snaps free.
Pop-Up or Lift-and-Turn Stoppers
Common in bathtub-shower combinations, these stoppers typically unscrew counterclockwise from the central shaft. Some models have a small set screw hidden underneath the cap that must be loosened first with an Allen wrench or flathead driver.
Once the cover is off, inspect the crossbars inside the drain throat. You will almost certainly find a dense ring of hair tangled directly around the metal supports. Put on a pair of rubber utility gloves and pull the tangled mass free using needle-nose pliers or a bent wire coat hanger. Dispose of the debris in a trash can rather than washing it back down the drain. If the drain was only slightly sluggish, this step alone might restore normal flow.
Step 2: Use a Barbed Plastic Drain Snake
If clearing the grate does not solve the problem, the blockage is sitting further down the vertical tailpiece or near the entrance of the P-trap. The most efficient tool for this depth is an inexpensive, flexible plastic drain snake, commonly known as a zip-it tool.
These long plastic strips feature backward-facing barbs that slide down easily but snag hair fibers as they are pulled backward. They measure roughly eighteen to twenty-four inches long—the exact distance needed to reach the trap without damaging the plumbing.
Insert the pointed end of the plastic snake directly into the drain opening. Work it downward past the crossbars with a gentle wiggling motion. As the tool moves down the pipe, you will feel slight resistance when it reaches the curve of the P-trap or encounters a tangle of hair.
Once the snake is fully inserted, rotate it slightly in a circular motion so the barbs catch the fibrous bundle. Do not yank the tool forcefully, as cheap plastic can snap off inside the drain. Instead, pull the snake upward slowly and steadily. The tool will drag out the hairball that was choking the pipe. Clean the debris off the barbs into a plastic bag, reinsert the snake at a slightly different angle, and repeat the process until the tool comes back up clean.
Step 3: Plunge the Shower Drain
When a barbed snake comes up empty but the water still drains sluggishly, the blockage is likely lodged deeper within the curve of the P-trap. A standard cup plunger uses hydraulic pressure to rock the blockage back and forth, breaking its hold on the pipe walls so water can wash it away.
To plunge a shower effectively, technique matters:
-
Select the correct plunger: Use a standard, flat-bottomed cup plunger. Do not use a toilet flange plunger with an extended rubber neck, as it will not form a flat, airtight seal against the shower floor.
-
Block overflow vents: If you are plunging a combination bathtub and shower, the tub features an overflow plate located a few inches below the rim. If you leave this plate open, plunging simply pushes air out through the overflow rather than forcing water down the drain. Unscrew the overflow plate and stuff a wet washcloth tightly into the opening, or seal it completely with heavy-duty duct tape to preserve pressure.
-
Add water to create a seal: A plunger cannot generate hydraulic force with air alone. Ensure there is at least one to two inches of standing water in the basin—enough to submerge the rubber rim of the plunger cup completely.
-
Seat the plunger: Smear a thin layer of petroleum jelly along the rim of the rubber cup to help it grip the shower floor. Angle the plunger into the water to let air escape from inside the dome, then press the cup firmly down over the drain opening.
-
Work with rhythmic strokes: Keeping the seal intact, pump the plunger up and down vigorously fifteen to twenty times. Focus equal energy on the upward pull as the downward push; the suction stroke often loosens debris more effectively than downward pressure.
-
Break the seal: On the final upward stroke, pull the plunger off the drain with a sharp pop. If the clog has loosened, you will hear a deep gurgle, and the standing water will drop rapidly.
Step 4: Break Up Residue with Baking Soda, Vinegar, and Hot Water
A physical tool clears the main hair mass, but sticky layers of soap scum and body oils often linger on the pipe walls, ready to catch new hair immediately. You can strip this greasy film using basic household items that do not damage pipes.
The combination of baking soda (sodium bicarbonate) and distilled white vinegar creates a mild chemical reaction that produces carbon dioxide gas. While this fizzy reaction is not strong enough to dissolve a massive clump of hair, the bubbling action and the acetic acid in the vinegar work together to loosen waxy buildup and deodorize stale pipes.
Begin by pouring a small kettle of hot tap water down the drain to warm the pipes and soften hardened grease.
Pour one cup of baking soda directly down the drain opening, using a funnel if necessary to ensure the powder falls into the pipe rather than sitting on the shower floor. Follow immediately with one cup of distilled white vinegar.
Cover the drain opening with a flat rubber drain stopper, a damp towel, or an inverted cup to keep the bubbling pressure inside the pipe rather than venting out into the room. Allow the mixture to sit undisturbed for thirty to forty-five minutes.
While the mixture works, heat a large pot of water on the stove. Turn off the heat just before it reaches a rolling boil—aiming for roughly 140 to 160 degrees Fahrenheit. Pouring rolling boiling water (212 degrees Fahrenheit) directly onto modern PVC pipes can soften the thin plastic fittings or compromise glued joints.
Uncover the drain and slowly pour the hot water straight down the center of the opening. The volume and temperature will flush the dissolved soap scum, baking soda residue, and loosened organic grime straight into the main sewer stack.
Step 5: Treat Persistent Buildup with Enzymatic Cleaners
If your shower still drains slower than it should after snaking and plunging, or if the drain regularly emits an earthy, stale odor, the interior walls of your plumbing likely have a heavy coating of biological biofilm.
The safest, most sustainable way to treat this is with a natural enzymatic or bacterial drain cleaner. Unlike corrosive chemicals, enzyme cleaners contain concentrated biological cultures that feed on organic matter—specifically grease, hair cells, soap scum, and starch. The enzymes break these complex organic compounds down into simple water and carbon dioxide over several hours.
Enzyme cleaners are completely safe for all types of plumbing, including PVC, ABS, copper, cast iron, and residential septic systems. Because they work biologically rather than chemically, they generate zero heat and emit no toxic fumes.
To use an enzymatic cleaner effectively, apply it at night right before going to bed, or before leaving the house for the day. Run warm water down the shower drain for thirty seconds to warm the pipe walls, then pour the recommended dosage of enzyme liquid directly into the drain. Leave the drain unused for six to eight hours so the living bacteria have ample time to colonize the pipe walls and consume the organic residue. Follow up the next morning by flushing the line with warm tap water for two minutes.
Step 6: Clear Deep Blockages with a Hand Auger
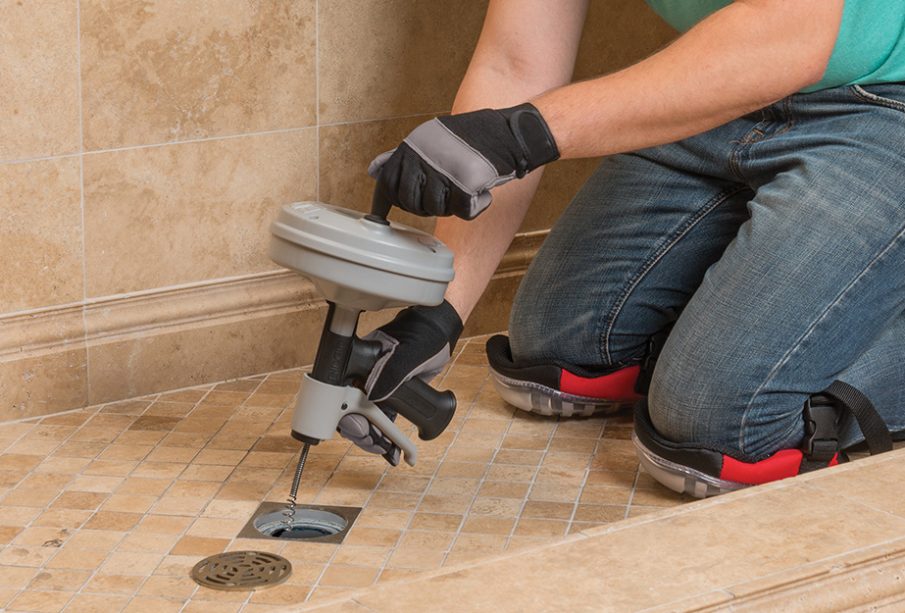
On rare occasions, a stubborn clog sits beyond the reach of a plastic zip-it tool and refuses to budge under a plunger. When this happens, a manual plumbing drum auger (often called a snake) provides the mechanical reach needed to resolve the issue.
Choose a light-duty, quarter-inch hand auger equipped with a steel cable roughly fifteen to twenty-five feet long.
Remove the drain grate and feed the steel cable into the drain opening by hand until you feel it hit resistance. That resistance is usually the first bend of the P-trap. Loosen the thumbscrew on the auger drum, pull out an extra six inches of cable, tighten the screw, and slowly rotate the drum handle clockwise while applying steady forward pressure. The rotating tip will guide the cable through the curves of the trap.
Once past the trap, continue feeding the cable into the horizontal waste pipe. When the cable stops advancing firmly, you have located the clog. Tighten the thumbscrew and crank the handle clockwise several times. The corkscrew tip at the end of the cable will bore into the dense obstruction, either entangling the hair so you can retrieve it or breaking the mass apart so water can wash it downstream.
Slowly reel the cable back into the drum, using a rag to wipe away grime as the metal retracts. Reassemble the drain grate and run hot water at full volume to confirm the line is flowing smoothly.
Everyday Habits to Prevent Future Shower Clogs
Fixing a slow drain takes time, but keeping it clear requires minimal effort once the pipes are clean. Adopting a few simple preventive habits will keep your shower draining freely for years to come:
-
Install a dedicated hair catcher: Standard drain grates have wide slots that let hair slip through easily. Place a fine stainless steel mesh screen or a domed silicone hair catcher over the drain. These catchers trap hair before it ever enters the plumbing and take only five seconds to wipe clean after every shower.
-
Brush your hair before washing: If you or family members have long hair, take thirty seconds to brush it thoroughly before stepping into the shower. Brushing removes loose, shed strands on a dry brush, keeping them out of the wet drainage system entirely.
-
Perform a monthly hot water flush: Make it a habit on the first of every month to pour a large kettle of very hot tap water down the shower drain, followed by a quick squirt of liquid dish soap. The concentrated soap cuts through fresh body oils, and the hot water carries residue away before it has a chance to solidify into sticky soap scum.
-
Switch from bar soaps to liquid body wash: Traditional bar soaps contain animal fats and binding agents that react heavily with hard water minerals, creating dense soap scum. Liquid body washes and shower gels rinse away much cleaner and leave far less residue behind on the pipe walls.
Tackling a sluggish shower drain does not require toxic products that endanger your plumbing or irritate your senses. By relying on smart mechanical extraction, safe household cleaners, and consistent maintenance habits, you can keep your drains running clear, protect your home, and enjoy a hassle-free shower every single morning.