The Correct Way to Plunge a Double Kitchen Sink
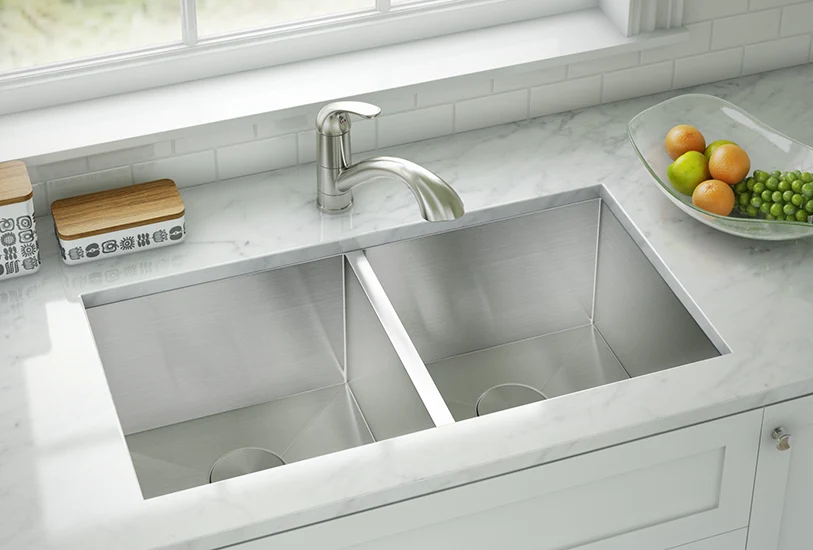
Standing in front of a backed-up kitchen sink is bad enough, but a double-basin setup introduces a unique brand of frustration. Most homeowners grab a plunger, center it over the standing gray water, give it a few energetic shoves, and watch in disbelief as dirty dishwater erupts from the opposite basin.
That sudden geyser happens because of basic plumbing geometry. Unlike a single-basin sink that runs a direct line down through the trap, a double kitchen sink connects both drains to a single drainpipe via a shared tee fitting. When you plunge one side without taking specific precautions, the air and water pressure simply take the path of least resistance, shooting right out the open drain next door instead of pushing through the clog.
Plunging a double kitchen sink is entirely doable, and it remains one of the most effective ways to clear stubborn organic blockages without dismantling your pipes. You just need to understand how the system works and follow the mechanics required to direct hydraulic force where it actually belongs.
Why Standard Plunging Fails on Connected Basins
To fix the problem, you have to picture what is happening beneath the cabinetry. Each basin features a vertical tailpiece dropping down from the strainer assembly. These two lines meet at a horizontal baffle tee or continuous waste connector before dropping into a single curved P-trap and disappearing into the wall.
When a clog forms, it almost always settles in the P-trap itself or just beyond it in the horizontal drain arm. Because water cannot compress, plunging uses hydraulic pressure to hammer against the clog, dislodging compacted food particles, congealed dish soap, and grease.
However, hydraulic pressure moves like an electric current: it always chooses the easiest escape route. If the adjacent drain is wide open to the atmosphere, every downward pump of the plunger harmlessly vents upward through that opening. The blockage stays completely undisturbed, and your countertops end up covered in foul water. Clearing the line requires creating an airtight, watertight closed loop so every ounce of force targets the obstruction.
Critical Safety Checks and Workspace Preparation
Before grabbing your tools, take two minutes to run through crucial safety precautions. Overlooking these steps can turn a minor plumbing hiccup into an emergency room visit or an expensive electrical repair.
Never Plunge After Using Chemical Cleaners
If you already poured commercial liquid drain cleaner down either drain, do not plunge the sink. Plunging generates significant splashing and upward suction. Forceful plunges can spray caustic chemicals onto your face, skin, and eyes, causing severe chemical burns. If chemical cleaners are sitting in the basins, bail out the standing water with a bucket, wait for the chemicals to work per the package instructions, or dilute and flush the system thoroughly before attempting mechanical clearing. If the chemical failed to clear the line, skip plunging entirely and call a licensed plumber.
Disconnect Power to the Garbage Disposal
If one of your sink basins houses a garbage disposal, disconnect its power source before placing your hands or tools anywhere near the drain. Flipping the wall switch off is not enough; switches can be bumped accidentally by a helper or family member. Crawl under the sink and unplug the disposal from the wall outlet. If the unit is hardwired directly into a junction box, switch off the dedicated circuit breaker at your main service panel.
Protect the Dishwasher Drain Line
Many modern kitchens have a dishwasher drain line clamped to the side inlet of the garbage disposal. Forceful plunging can push dirty, contaminated sink water backward through this corrugated line and straight into the bottom of your clean dishwasher. Under the sink, locate the flexible ribbed hose leading from the dishwasher to the disposal. Check if it has a high loop secured near the top of the underside of the counter, or an air gap on top of the sink. If it does not, use a pair of locking pliers—cushioned with a folded rag to prevent crushing the plastic—to gently pinch the dishwasher line shut while you plunge.
Choosing the Right Plunger
Using the wrong plunger is the most common reason homeowners fail to clear sink clogs.
There are two primary types of household plungers:
-
Flange Plungers: These feature an extended rubber collar or sleeve protruding from the bottom of the cup. They are specifically shaped to fit down into the curved throat of a toilet bowl. They do not form an effective flat seal against kitchen sink basins.
-
Standard Cup Plungers: These feature a flat-bottomed, dome-shaped rubber cup mounted to a wooden or plastic handle. This flat rim is specifically designed to sit flush against the flat stainless steel, cast iron, or composite surface of a sink floor.
Select a standard cup plunger with a pliable, undamaged rubber cup. If the rubber is old, dried out, or stiff, run it under hot tap water for a couple of minutes to soften the material so it conforms tightly to the bottom of the basin.
Step-by-Step Instructions to Plunge a Double Sink
Once your safety precautions are handled and the right tool is in hand, you can begin the process. Having an extra set of hands makes this significantly easier, though it can be accomplished solo with the right technique.
1. Establish the Proper Water Level
A plunger cannot generate meaningful hydraulic force through air alone; air compresses, which absorbs the impact of your strokes. Water, on the other hand, is nearly incompressible and transmits physical force directly to the blockage.
Inspect the basin you plan to plunge. You need approximately three to four inches of standing water—just enough to completely submerge the rubber head of the plunger. If the sink is empty because the water drained slowly over several hours, add warm tap water until the base is covered. If the sink is brimming near the rim, bail out the excess into a bucket so you do not slosh wastewater onto your counters during the process.
2. Seal the Secondary Basin Drain
This is the pivotal step that determines success or failure. You must completely seal the drain on the side you are not plunging.
Take a clean, thick hand towel or washcloth, run it under the faucet until it is soaking wet, and pack it tightly into the secondary drain opening. Wet fabric creates a significantly tighter seal against air and water leakage than dry cloth. For an even more secure barrier, stuff the wet towel inside a plastic grocery bag before jamming it into the drain opening.
Once packed, press down firmly on the sealed drain with the palm of your hand, or have a helper hold it down using a heavy rubber flat stopper or a folded towel. Do not release this pressure until plunging is completely finished. If this seal slips or vents, all driving force is instantly lost.
3. Seat and Burp the Plunger
Move to the clogged basin. If one side has a garbage disposal and the other does not, it is generally best to plunge the disposal side first, as food debris commonly lodges near the disposal outlet flange.
Coat the rim of your plunger cup with a thin layer of petroleum jelly if you struggle to get suction; this helps create an airtight boundary against smooth sink surfaces.
Angle the plunger as you submerge it into the standing water. Tipping it sideways allows trapped air inside the dome to escape to the surface, filling the inside of the cup with water. Once burped, center the cup directly over the drain strainer opening and press straight down until the rubber lip forms a flat, unbroken seal against the sink floor.
4. Execute the Push-Pull Motion
Plunging is not simply a matter of pushing downward as hard as you can. In reality, the upward pull stroke is often more effective at breaking apart stubborn clogs than the downward push stroke. Downward force can compact food debris into a tighter plug, while upward suction pulls the mass apart, loosening its grip on the pipe walls.
Maintain a tight seal and initiate deliberate, rhythmic strokes:
-
Push down firmly to depress the rubber dome without breaking the rim seal against the metal.
-
Pull back up sharply, utilizing the suction power of the cup to draw water backward out of the drain line.
-
Repeat this rapid, pumping motion ten to fifteen times in continuous succession, keeping the shaft vertical and steady.
-
On the final upward stroke, pull the plunger entirely off the drain with a decisive pop.
5. Check Drainage and Flush the Line
If the technique worked, you will hear a distinct gurgling sound followed by water swirling down the drain quickly. If the water drains slowly or not at all, repeat the ten-to-fifteen-stroke cycle two or three more times. Stubborn accumulations of congealed grease often require multiple sessions of push-pull pressure before the core of the clog gives way.
Once the standing water drains freely, remove the wet towel from the secondary basin. Turn on the hot water tap in both basins and let it run at full volume for three to five minutes. The sustained heat softens residual grease deposits, while the volume carries loose fragments through the P-trap and into the larger main stack.
Finally, reconnect the garbage disposal power cord, remove any clamp on the dishwasher drain hose, and run the disposal with cold water for thirty seconds to clear its grinding chamber.
What to Do If the Clog Persists
If three vigorous rounds of plunging fail to restore flow, the blockage is either too dense for hydraulic pressure or located farther down the system than the sink trap. Continuing to plunge with excessive force risks cracking old slip-joint nuts or loosening pipe joints under the sink, which can cause leaks inside your cabinets.
At this point, shift to mechanical disassembly:
-
Clear the P-trap manually: Place a shallow plastic tub directly beneath the curved trap under the sink. Unscrew the two slip-joint nuts securing the curved J-bend using tongue-and-groove pliers or your hands if they are plastic. Pull the trap free and inspect it over a bucket. In many cases, you will find compacted coffee grounds, fibrous vegetables, or small utensils wedged directly in the bend. Clean it out with a stiff brush, reinstall the trap, hand-tighten the nuts, and check for leaks.
-
Use a small drum auger: If the P-trap is clear, feed a quarter-inch sink auger directly into the horizontal pipe entering the wall. Rotate the cable while advancing it forward until you feel resistance, work through the obstruction, retrieve the cable, and reassemble the pipes.
Keeping Double Sinks Running Smoothly
Once your drains are clear, practical kitchen habits prevent the issue from recurring:
-
Collect cooking fats separately: Never pour bacon grease, pan drippings, melted butter, or cooking oil down either side of the sink. Liquid fat cools inside unheated underground pipes, clinging to the walls and acting as an adhesive for solid food particles. Pour grease into an empty can, allow it to solidify, and discard it in the trash.
-
Use sink strainers continuously: Keep a fine mesh basket strainer over the non-disposal drain at all times. It catches small food particles, stray pasta, and debris that easily slip past standard drain grates.
-
Treat your garbage disposal correctly: Always run cold water before, during, and for fifteen seconds after running the disposal. Cold water keeps trace fats solid so the impellers can chop them into fine grains rather than smearing them onto pipe interiors. Avoid feeding stringy vegetables like celery, corn husks, onion skins, and starchy potato peelings into the machine.
-
Perform regular hot water flushes: Once a week, fill both sink basins halfway with hot water, add a small splash of dish soap, and pull both stoppers simultaneously. The heavy volume and weight of warm soapy water creates a natural flushing action that scours the walls of the shared waste line before residue can build into a blockage.
Meta Title: The Correct Way to Plunge a Double Kitchen Sink
Meta Description: Learn how to plunge a double kitchen sink the right way. Follow this step-by-step guide to seal connected drains, use proper suction, and clear clogs fast.