Flushing Your Water Heater: A Step-by-Step Maintenance Guide
Tucked away in a basement, garage, or utility closet, the water heater ranks among the hardest-working appliances in any home. It operates continuously, keeping tens of gallons of water heated to a precise temperature day and night. Because it runs quietly behind closed doors, it is also the appliance most likely to be completely ignored until a shower turns ice-cold or an ominous puddle spreads across the floor.
The primary culprit behind premature water heater failure is invisible from the outside: sediment. Regardless of whether your home runs on municipal city water or an underground well, domestic water contains naturally dissolved minerals, primarily calcium and magnesium carbonate. Every time the burner or lower heating element kicks on, heat forces these dissolved minerals to precipitate out of the liquid. Over months and years, these microscopic mineral flakes settle onto the concave floor of the tank, forming a dense, chalky layer of rock and sludge.
Flushing your water heater once a year sweeps away this accumulated mineral bed, restoring heating efficiency, extending the lifespan of the tank, and keeping utility bills in check. The process requires only basic household tools, an inexpensive garden hose, and about an hour of your time.
Why Sediment Kills Water Heaters
To understand why flushing is vital, consider what happens when heat tries to travel through rock. In a standard gas water heater, the gas burner sits directly underneath the steel bottom head of the tank. In an electric unit, the lower electric resistance element sits just a few inches off the tank floor.
When a thick layer of mineral sediment blankets the bottom of the tank, it creates a powerful thermal insulator. The gas burner must fire longer and burn far hotter to push heat through two inches of limestone sludge just to reach the water above. This localized overheating slowly weakens the steel vessel, degrades the internal glass lining, and eventually causes the tank to crack and leak.
In electric water heaters, the problem manifests differently but just as destructively. As sediment levels rise, the lower heating element becomes buried in sand-like minerals. Unable to dissipate its thermal energy into moving water, the element overheats, buckles, and burns out prematurely.
Beyond structural damage, sediment buildup steals money every month. A sediment-choked tank can lose significant thermal efficiency, requiring noticeably more cubic feet of natural gas or kilowatt-hours of electricity to produce the exact same volume of hot water.
Warning Signs That Your Tank Needs an Immediate Flush
If you cannot recall the last time your water heater was serviced, the machine will usually broadcast its distress through distinct audible and physical symptoms.
-
Popping and Rumbling Sounds: When water gets trapped beneath a layer of compacted sediment on the tank floor, the intense heat beneath boils that trapped water instantly. The resulting steam bubbles force their way violently up through the mineral layer, creating a distinct crackling, popping, or deep rumbling sound often referred to as kettling. If your water heater sounds like a pot of boiling oatmeal, sediment is severe.
-
Lukewarm or Inconsistent Showers: If your hot water runs out halfway through a shower that used to be comfortably long, sediment has displaced valuable water volume and insulated the heating source, significantly reducing the tank’s recovery rate.
-
Cloudy, Sandy, or Discolored Hot Water: When sediment accumulates past a manageable threshold, turbulent incoming water stirs it up into suspension. If your hot water displays a faint brownish tint or leaves gritty white flakes in the bottom of the bathtub, the mineral bed has reached the height of the lower draw line.
-
Reduced Hot Water Pressure: Fine mineral grit can travel out of the hot water outlet pipe and lodge inside faucet aerators, shower cartridge screens, and appliance supply valves, choking water flow throughout the house.
A Quick Drain vs. A Dynamic Flush
Many homeowners believe that simply hooking up a hose and draining the tank by gravity counts as flushing. It does not.
When you drain a tank by simply opening the lower spigot and letting gravity do the work, water trickles out slowly. The heavy, pebble-sized chunks of calcium carbonate resting on the bottom will not move; they simply settle deeper into the floor as the water level drops.
A true, effective flush uses dynamic hydraulic pressure. By leaving the cold water supply open—or cycling it on and off in powerful bursts while the drain valve is open—the incoming high-velocity water rushes down the internal dip tube and scours the bottom of the tank. This violent swirling motion churns settled lime and grit into a suspended slurry, driving it out through the hose.
Tools and Gear for the Job
Before turning a single valve, gather a few basic supplies to ensure a smooth, mess-free maintenance session:
-
A standard garden hose: Choose a short, heavy-duty rubber hose rather than a cheap vinyl hose. Scalding hot water softens vinyl, which can cause it to kink or collapse under heat.
-
A large flathead screwdriver or groove-joint pliers: Required to turn the slotted stem on plastic or brass drain valves.
-
A five-gallon utility bucket: Essential for testing the clarity of the water and checking how much sediment is being expelled before routing the hose elsewhere.
-
Heavy work gloves and safety glasses: The water exiting the tank can easily exceed 120 degrees Fahrenheit and contains scalding grit.
-
A garden hose thread cap: An inexpensive brass cap fitted with a rubber washer to seal the drain spigot if the valve fails to seat completely when you finish.
Choose your drainage destination carefully. An unfinished basement floor drain or an outdoor driveway sloped away from the foundation works best. If you route the hose outside onto a lawn or near delicate garden beds, remember that near-boiling water will instantly kill grass and plants.
Step-by-Step Guide to Flushing Your Water Heater
Follow these steps in precise order to flush your water heater safely without burning out heating elements or flooding your home.
Step 1: Turn Off the Power or Gas Supply
Safety begins with cutting the heat source. Skipping this step on an electric water heater is a costly mistake. If the heating elements turn on while exposed to open air rather than submerged in water, they will dry fire and burn out within thirty seconds.
For an electric water heater, walk to your home’s main electrical service panel and switch the dedicated two-pole 240-volt circuit breaker labeled “Water Heater” to the Off position.
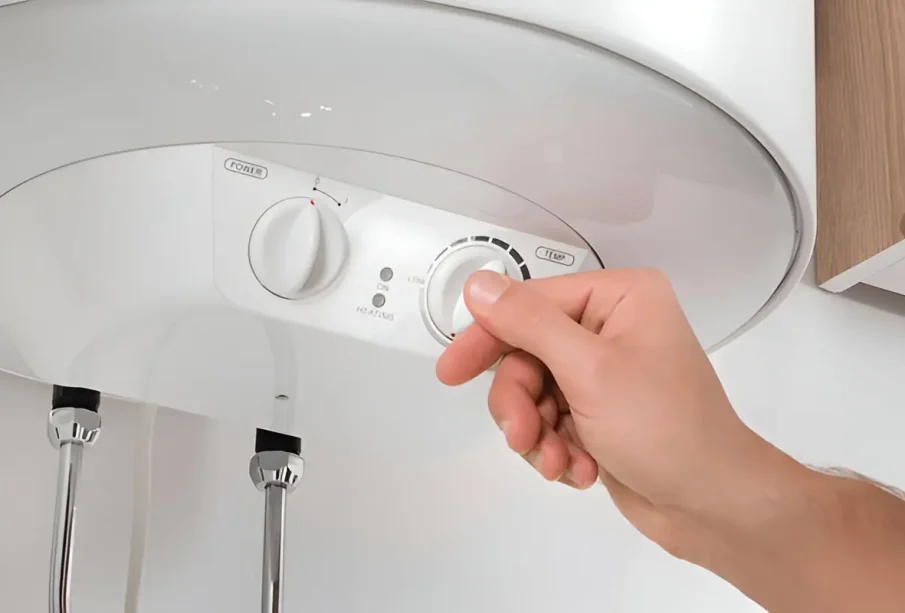
For a gas water heater, locate the thermostat control gas valve on the front of the tank. Rotate the dial from the “On” position to the Pilot or Vacation setting. This prevents the main burner from firing while keeping the pilot flame lit so you do not have to relight it later.
Step 2: Connect the Hose and Stage the Drain
Locate the drain valve near the bottom base of the tank. Thread your garden hose securely onto the valve fitting, ensuring the internal rubber washer is intact to prevent leaks. Run the other end of the hose to your drain location, or coil the end into your five-gallon bucket if you want to inspect initial discharge. Keep the hose line as straight as possible; sharp kinks will trap heavy sediment and choke flow.
Step 3: Shut Off the Cold Water Supply
Look directly above the water heater. You will find two pipes entering the top: the hot water outlet on the left and the cold water inlet on the right. Trace the cold water line until you find the shut-off valve. If it is a modern ball valve, turn the lever ninety degrees so it sits perpendicular to the pipe. If it is an older round gate valve, turn the wheel clockwise until it stops completely.
Step 4: Relieve Internal Tank Pressure
Water will not drain freely from an airtight container; attempting to drain a sealed tank creates a vacuum that holds the water in place, much like putting your thumb over the top of a drinking straw.
Walk to the highest floor in your home or the sink closest to the water heater and turn on a hot water faucet fully. This allows air to enter the domestic plumbing lines, breaking the vacuum lock and allowing the tank to drain smoothly below.
Step 5: Open the Drain Valve and Drain the Initial Volume
Using your flathead screwdriver or pliers, turn the drain valve counterclockwise to open it. Water should begin flowing through the hose immediately. Let the first few gallons pour into your five-gallon bucket.
Take a close look at this discharge. In a tank that has not been serviced in years, the water may look cloudy, milky, or dark brown, with small crystalline pebbles rattling into the bottom of the plastic bucket. Once you confirm the water is flowing steadily and see the sediment load, move the open end of the hose to your floor drain or outdoor discharge point and let the tank empty completely.
Step 6: Power-Flush the Bottom of the Tank
Once gravity drainage slows to a trickle, the real cleaning begins. Most of the heavy sediment remains stuck on the tank bottom.
Leave the drain valve wide open at the base of the tank. Walk back to the top of the heater and turn the cold water supply valve fully open for roughly thirty seconds. High-pressure cold water will plunge down the internal dip tube, ricochet off the curved floor, and churn the remaining sediment deposits into a violent whirlpool.
Turn the cold water valve off, wait one minute for the churned water to drain out the hose, and then turn it back on. Repeat this cycling process three to five times. Watch the hose discharge carefully. Continue cycling the cold water supply in bursts until the water emerging from the hose runs completely crystal clear and free of gravel-like residue.
Step 7: Close the Drain Valve and Refill the Tank
Once the water runs clear, close the lower drain valve completely. Disconnect the garden hose. If the drain valve is older and weeps a few drops after closing, screw your brass hose cap with a rubber washer onto the male threads to ensure a permanent seal.
Keep the hot water faucet upstairs open. Now, turn the cold water supply valve on top of the tank completely open. The tank will begin refilling with fresh water.
As water fills the 40- or 50-gallon capacity, it will force all the trapped air out through the open hot water faucet upstairs. You will hear sputtering, hissing, and coughing as air blasts through the plumbing fixtures. Once a solid, unbroken stream of cold water runs from the upstairs faucet without spitting air, the tank is completely full. You can now close the upstairs faucet.
Step 8: Restore Heat and Check for Leaks
Verify once more that water flows smoothly from every hot water faucet in the house before restoring power. This double-check guarantees that the electric elements are completely submerged, eliminating the risk of dry firing.
For an electric unit, switch the dedicated circuit breaker back to the On position.
For a gas unit, turn the gas valve dial from “Pilot” back to the On or standard operational setting. You should hear the burner ignite within a few moments.
Inspect the lower drain valve, the cold water shutoff valve, and the fittings on top of the tank for any signs of weeping or moisture. Allow roughly forty-five minutes for a gas unit or an hour and a half for an electric unit to heat the incoming water to full temperature.
Troubleshooting Common Flushing Complications
While the flushing procedure is straightforward, older plumbing systems occasionally present unexpected challenges.
The Drain Valve Is Clogged With Heavy Minerals
If you open the drain valve and only a trickle or nothing at all emerges, dense mineral sediment is blocking the opening behind the valve seat.
Do not force the valve handle, especially if your heater uses a cheap factory plastic spigot; plastic stems can shear off easily, leaving you with an uncontrollable leak. Instead, connect your garden hose to a functioning outdoor spigot or laundry sink, connect the other end to the water heater drain valve, and open both valves for three seconds. This brief burst of reverse pressure forces the sediment plug backward into the open volume of the tank. Close the outside faucet immediately, remove that end of the hose, direct it toward your drain, and open the water heater valve again. The path should now be clear.
Alternatively, you can carefully unthread the garden hose, insert a short length of stiff, insulated copper electrical wire or an unbent wire hanger into the drain opening, and gently poke through the crust to break the obstruction. Always wear heavy rubber gloves and safety glasses when doing this, as hot water and steam can surge outward the instant the blockage breaks free.
The Ancient Tank Dilemma
If your water heater is more than eight to ten years old and has never once been flushed, approaching it requires caution. In heavily neglected tanks, severe galvanic corrosion may have eaten microscopic pinholes into the steel wall beneath the sediment blanket. In these extreme cases, the dense calcified mineral layer is actually functioning as a temporary plug, keeping the tank from leaking.
If you aggressively power-flush a ten-year-old, never-maintained tank, you run a slight risk of washing away the very mineral crust holding back an active leak. If an old tank exhibits extensive external rusting, heavily corroded fittings, or dampness around the base, consult an experienced plumber to assess the tank’s integrity before attempting a dynamic flush.
Protecting Your Water Heater Between Flushes
Flushing the tank cleans out existing deposits, but simple proactive habits prevent rapid sediment formation in the future:
-
Maintain the Sacrificial Anode Rod: Inside the tank hangs a long rod made of magnesium or aluminum wrapped around a steel core wire. This sacrificial rod corrodes intentionally to protect the steel tank from rust. When the anode rod completely dissolves, minerals attack the tank walls directly. Inspect the rod every three years and replace it when more than six inches of the steel core wire becomes exposed.
-
Keep Temperatures at 120 Degrees Fahrenheit: Many factory thermostats are set to 140 degrees Fahrenheit. Water temperatures above 125 degrees accelerate mineral precipitation dramatically, causing scale to form twice as fast. Setting the thermostat to 120 degrees prevents scalding, saves energy, and substantially slows down mineral fallout.
-
Address Extreme Water Hardness: If you live in an area with exceptionally hard water—generally above seven to ten grains per gallon—installing an ion-exchange water softener or a whole-house scale prevention filter will intercept minerals before they ever reach the water heater.
Devoting one hour each year to flushing your water heater protects a costly home appliance, keeps energy costs predictable, and ensures that hot water remains a reliable, quiet comfort throughout your home.