Replacing a Shower Valve Cartridge to Stop a Dripping Faucet
A steady drip from a showerhead has a way of cutting through the quiet of an entire house. Beyond the maddening rhythm echoing against the tub basin, that slow leak quietly wastes hundreds of gallons of water each month, drives up utility bills, and leaves stubborn rust stains across your tile or acrylic surround.
When homeowners encounter a dripping shower, the instinctive reaction is often to unscrew the showerhead and replace it. That almost never works. A showerhead is merely an open nozzle at the end of a delivery pipe; it contains no internal shut-off mechanism. When water drips while the handle is pushed or turned fully to the off position, the failure lies deeper inside the wall within the shower valve cartridge.
The valve cartridge is the operational core of modern single-handle showers. It balances incoming hot and cold water pressure, controls water volume, blends water temperature, and forms a watertight barrier against continuous municipal pressure. Over years of daily service, mineral deposits and friction wear down the cartridge’s rubber seals, internal ceramic discs, or brass sleeves.
Replacing this component eliminates the drip, restores effortless handle movement, and protects your plumbing. While opening up a bathroom wall fixture sounds intimidating, the project requires no soldering, no pipe cutting, and only a modest set of standard hand tools.
How Shower Valves Fail and Why Cartridges Leak
To tackle the repair effectively, it helps to understand what is happening behind your shower surround. Hot and cold water supply lines feed directly into a solid brass or composite valve body secured inside the wall cavity. Under normal conditions, these lines remain under constant pressure between 40 and 80 pounds per square inch.
The shower valve cartridge slides directly into the central bore of this valve body. When you turn the handle, ports inside the cartridge align with the hot and cold water inlets, allowing water to mix and flow upward through the vertical riser pipe to the showerhead. When you shut the handle off, internal rubber grommets, O-rings, or precision-ground ceramic plates compress against the brass housing to block water flow entirely.
Over time, two primary factors degrade this seal:
-
Friction and Mineral Abrasion: Hard water contains dissolved calcium and magnesium. As water evaporates around internal seals, these minerals precipitate into sharp micro-crystals. Turning the handle drags these abrasive crystals across flexible rubber O-rings, eventually gouging the rubber or scoring the plastic housing.
-
Chemical Degradation: Municipal tap water treated with chlorine and chloramines slowly breaks down standard synthetic rubber compounds. The rubber loses its elasticity, hardens, flattens, or develops microscopic cracks, allowing pressurized water to seep past the gate even when the handle is completely closed.
Once water slips past the cartridge seals, gravity pulls it upward through the riser tube, resulting in a persistent, slow trickle from the showerhead or tub spout.
Identifying Your Shower Valve Brand and Replacement Part
Shower cartridges are not universal. Every major plumbing manufacturer engineers proprietary valve bodies that accept only specific cartridge designs. Before starting your repair, you must determine what brand and model you are working with.
Most residential showers feature fixtures from a handful of major brands:
-
Moen: The majority of Moen single-handle showers use either the classic brass or plastic 1225 cartridge (found on older pull-on/push-off handles) or the modern 1222 Posi-Temp cartridge (found on rotational single-handle fixtures). Both styles rely on a distinct metal U-shaped retaining clip inserted from the top of the valve body.
-
Delta: Older Delta single-handle valves rely on a ball-and-cam mechanism with small individual rubber seats and internal springs. Modern Delta fixtures utilize the 1300/1400 series or the MultiChoice 17/17T series cartridges, which are secured by a large threaded brass bonnet nut.
-
Kohler: Kohler commonly uses their proprietary Rite-Temp cartridge system, recognizable by a cap secured with threaded screws or a substantial metal locking collar.
-
American Standard, Pfister, and Symmons: These manufacturers also use brand-specific cartridges, secured either with threaded retainer rings or direct front-mounting screws.
Look closely at the decorative trim plate behind your shower handle. Most manufacturers stamp or laser-etch their brand logo onto the bottom or center of this plate. If the logo has worn away, you can photograph the valve and cartridge once disassembled to match it at a local plumbing supply counter or home improvement store.
Essential Tools and Worksite Preparation
Gathering the correct equipment before turning off your water ensures the job goes smoothly without emergency trips to the hardware store with your water supply disabled.
You will need:
-
A set of small hex keys (Allen wrenches), typically 3/32-inch or 1/8-inch sizes
-
Medium Phillips and flathead screwdrivers
-
Tongue-and-groove pliers (Channel locks)
-
An adjustable wrench
-
A utility knife or razor scraper
-
A stiff-bristled utility brush or old toothbrush
-
Distilled white vinegar
-
Food-grade plumber’s silicone grease (do not use petroleum jelly or WD-40)
-
A replacement cartridge matched to your specific valve
-
A manufacturer-specific cartridge puller tool (especially helpful for stubborn Moen cartridges)
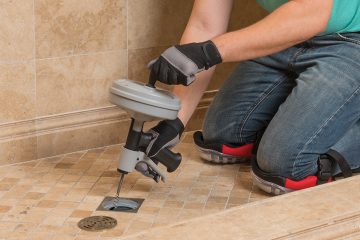
Before loosening a single screw, execute the most critical preparatory step in bathroom plumbing: cover the shower drain completely with a thick dry towel or rag. Shower handle set screws, retaining clips, and small washers are tiny and slippery. Dropping a specialized stainless steel fastener down an open shower drain will instantly derail your afternoon.
Step-by-Step Cartridge Replacement Procedure
Follow these sequential steps to dismantle the fixture, extract the failed component, and install the new cartridge safely.
1. Shut Off the Water Supply and Drain Residual Pressure
Never attempt to service a shower valve with pressurized lines. Locate your home’s main water shut-off valve—typically located in the basement, utility room, or outdoor meter pit—and close it completely.
Some upscale or custom bathrooms feature integrated service stops built directly into the brass shower valve body inside the wall. If present, these appear as two flathead screw heads located on the left and right wings of the valve casing. Turning these ninety degrees isolates the shower without shutting down the entire home. However, because these local stops can weep or seize over time, shutting off the main household supply remains the safest approach.
Once the main valve is shut, walk to the lowest plumbing fixture in the house (such as a basement laundry sink or outdoor garden spigot) and open it fully to drain standing water from the domestic supply pipes. Finally, open the shower handle you plan to repair to release any residual pressure trapped in the bathroom riser.
2. Remove the Handle and Decorative Trim
Locate the fastener securing the shower handle to the cartridge stem. On lever-style handles, the set screw is typically tucked into a small recess on the underside of the handle body, accessible with a small hex key. On round acrylic or traditional knob handles, the screw is usually hidden beneath a decorative snap-on index cap on the front face. Pop this cap off gently with the tip of a utility knife, then remove the central Phillips screw.
Pull the handle straight off the stem. If mineral deposits have bonded the handle to the metal cartridge spline, do not pry forcefully against the tile, which can crack brittle wall materials. Instead, wiggle the handle gently back and forth while applying steady outward traction, or soak the connection with a vinegar-soaked cloth for fifteen minutes to dissolve mineral scale.
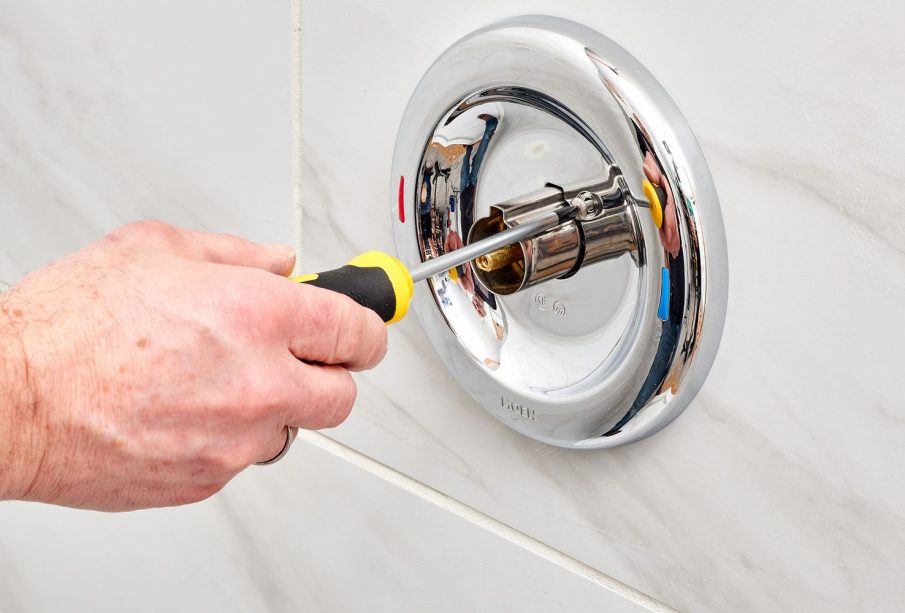
Next, remove the decorative sleeve (stop tube) that slides over the valve neck. Unscrew the two long mounting screws holding the large circular escutcheon trim plate against the wall. If the plate is sealed to the tile with silicone caulking, slice cleanly through the bead of sealant with a sharp utility knife before pulling the plate away.
3. Remove the Retaining Clip or Bonnet Nut
With the trim out of the way, you can see the brass valve body nestled inside the wall opening. The cartridge is held securely in place against water pressure by either a retaining clip or a threaded bonnet nut.
If servicing a Moen valve, locate the flat brass or stainless steel U-shaped clip sliding down through the top of the valve housing. Hook the top curve of the clip with needle-nose pliers or a small flathead screwdriver and lift it straight upward. Set it on a flat surface away from the work area. Inspect the clip; if it is bent, corroded, or warped, replace it with the new clip that typically ships inside your replacement cartridge kit.
If servicing a Delta or Kohler valve, the cartridge is secured by a round threaded brass bonnet ring. Fit an adjustable wrench or large tongue-and-groove pliers around the outer circumference of the nut and turn counterclockwise. Always support the brass valve body with your free hand while applying turning force. Applying excessive torque without stabilizing the valve can twist or snap the thin copper water supply tubes concealed inside the wall framing.
4. Extract the Old Cartridge
With the retaining mechanism cleared, the cartridge can be pulled from the valve bore.
Plastic cartridges occasionally slide out with firm hand pressure or a gentle tug from locking pliers clamped onto the brass stem. However, if the cartridge has occupied that valve body for five to ten years, mineral crust will have bonded the plastic or brass casing to the interior walls of the chamber.
For Moen cartridges, use the white plastic square twisting tool included in the replacement box, or thread on a specialized metal cartridge puller. Slide the tool over the stem, tighten the central bolt, and twist the cartridge thirty degrees clockwise and counterclockwise to break the mineral bond before pulling straight back. Never twist a plastic cartridge forcefully by the front tabs alone, as the ears can shear off, leaving the main body stranded inside the brass bore.
For Delta assemblies, grasp the front stem and pull straight out. If the valve utilizes independent rubber seats and small conical springs tucked into the rear inlets, use an Allen wrench or dental pick to hook these components out of the recessed chambers. Always replace these seats and springs alongside the cartridge.
5. Clean and Flush the Valve Bore
This is the step that separates a lasting repair from a short-lived one. Never insert a brand-new cartridge into a dirty, calcified valve chamber. Any grit, scale, or loose rubber fragments left behind will score the new seals immediately, causing the new cartridge to leak within days.
Inspect the interior walls of the cylindrical brass bore using a flashlight. If you see white chalky scale or green copper oxidation, clean the chamber:
-
Dip a stiff nylon utility brush or an old toothbrush into distilled white vinegar.
-
Scrub the inside walls of the brass chamber thoroughly to dissolve mineral residue.
-
Wipe the bore clean using a lint-free cotton cloth wrapped around your finger, feeling for rough burs or gouges in the metal.
Before inserting the replacement, perform a brief system flush to blow out dislodged debris:
Hold an empty plastic five-gallon bucket or a large folded towel directly in front of the open valve body in the wall. Have a helper crack the main household water supply valve open for three to five seconds. A high-velocity blast of water will shoot out of the open valve ports, flushing any loose sand, solder flecks, or mineral chips out of the supply pipes. Shut the water back off immediately.
6. Lubricate and Install the New Cartridge
Remove your replacement cartridge from its packaging. Locate the small packet of clear silicone grease included in the box.
Apply a generous, even coating of plumber’s silicone grease to all exterior rubber O-rings, side seals, and ribs on the new cartridge. This lubricant serves two critical purposes: it prevents the rubber from tearing or rolling out of its groove during insertion, and it ensures smooth handle operation over the coming years. Never use petroleum-based lubricants such as petroleum jelly, motor oil, or general spray lubricants; petroleum hydrocarbons break down synthetic EPDM rubber, causing the seals to swell, disintegrate, and fail within months.
Inspect the orientation markers on the cartridge. Most designs feature distinct alignment keys, raised tabs, or the letters “H” and “C” molded into the plastic body. Align the “H” side toward the left (hot water supply) and the “C” side toward the right (cold water supply).
Slide the cartridge into the valve bore, pressing firmly with both thumbs until it seats completely against the rear shoulder of the housing. Do not hammer or force the cartridge with metal tools. If it resists seating, remove it, reapply lubricant, verify that no debris remains at the back of the chamber, and try again.
7. Reinstall Retaining Hardware and Set the Rotational Limit Stop
Once the cartridge is fully seated, reinstall the mechanical retention device:
-
For retaining clips, slide the U-clip straight down through the matching slots in the brass valve body. The clip must drop down smoothly without extreme force. If the clip will not seat completely flush, the cartridge is not pushed deep enough into the bore. Wiggle the stem until the clip slides into place.
-
For threaded bonnet rings, hand-thread the ring clockwise onto the valve body, ensuring the threads do not cross. Snug the ring down with an adjustable wrench until firm. Do not over-tighten; over-compressing bonnet nuts can distort the cartridge body and make the shower handle exceptionally stiff to rotate.
Most modern replacement cartridges come equipped with an adjustable rotational limit stop (anti-scald ring). This small plastic gear or cam ring sits on the front stem and limits how far the handle can rotate into the hot water zone, preventing scalding.
Before reinstalling the trim, slip the handle temporarily onto the stem and rotate it to the maximum hot position. If the handle stops before reaching an adequate shower temperature, pull the limit stop collar forward, rotate it a few notches toward the hot side, and snap it back into place.
8. Pressurize, Test, and Reassemble Trim
Before screwing the decorative faceplates back onto the wall, test the installation under full line pressure:
-
Confirm that the shower handle is in the off position.
-
Slowly turn your home’s main water supply valve back on, allowing pipes to repressurize gently.
-
Return to the bathroom and inspect the perimeter of the shower valve cartridge with a flashlight.
-
Let the fixture sit under static pressure for five minutes. Verify that there is zero weeping around the retaining clip or bonnet nut, and confirm that the showerhead and tub spout remain completely dry.
-
Turn the shower handle on and off multiple times to confirm proper water flow, temperature blending, and smooth handle movement.
Once verified leak-free, reinstall the stop tube and the large escutcheon plate. Run a neat bead of mold-resistant silicone bathroom caulk around the top and sides of the escutcheon plate where it meets the tile, leaving a small opening at the very bottom edge. This weeping notch allows any incidental water that creeps behind the plate to drain harmlessly out into the shower pan rather than collecting inside the wall cavity.
Reinstall the handle, tighten the set screw securely with your hex wrench, and replace the decorative index cap. Finally, remove the protective towel from the drain.
Troubleshooting Post-Installation Complications
In the vast majority of cases, replacing the cartridge resolves the issue immediately. If you encounter unexpected behavior after installation, consult these common solutions:
Hot and Cold Water Are Reversed
If turning the handle toward the hot indicator produces cold water and vice-versa, the cartridge was installed 180 degrees out of phase.
You do not need to buy a new cartridge or shut off the main water line. Simply remove the shower handle, remove the plastic limit stop ring, and use pliers to rotate the central brass stem exactly 180 degrees until the small notch or flat side faces the opposite direction. Reinstall the limit stop and handle; your temperature balance will be restored.
The Showerhead Still Drips
If a steady drip continues even with a brand-new, correctly installed cartridge, examine the valve body itself.
In older homes, prolonged exposure to acidic water or heavy scale can pit, scratch, or erode the internal brass casting where the rubber seals seat. If the brass bore is physically scored or out of round, new rubber seals cannot form an airtight barrier. While shallow scoring can occasionally be polished smooth with fine emery cloth, severe pitting requires replacing the entire shower valve assembly inside the wall, a job best entrusted to a licensed plumbing professional.
The Handle Feels Stiff or Binds
If the new handle requires excessive effort to turn, the bonnet nut was likely over-torqued during reassembly, or the cartridge was inserted without adequate silicone grease. Loosen the bonnet nut slightly, check for smooth rotation, and ensure the stop tube is not rubbing against the back of the handle.
Restoring a dripping shower valve requires patience and methodical execution, but it eliminates the expense of a service call while saving water and keeping utility costs under control. With the right part in hand and a clean brass valve bore, this straightforward maintenance task keeps your bathroom quiet, efficient, and reliable for years to come.